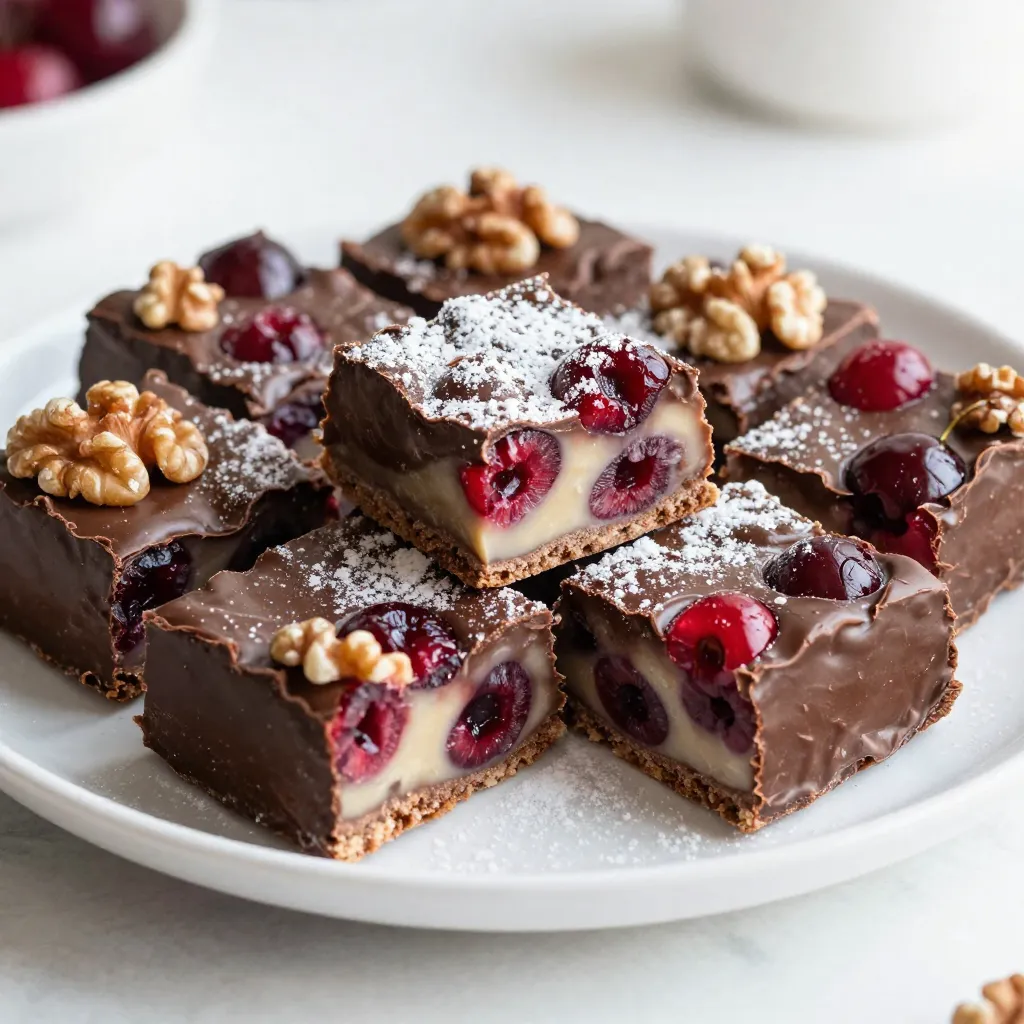
Ready to satisfy your sweet tooth? My Cherry Garcia Fudge Squares blend rich dark chocolate, sweet cherries, and crunchy nuts into a delightful treat. In just a few simple steps, you can create a dessert that impresses everyone. Plus, I’ll share tips, tricks, and yummy variations to make this fudge your own. Let’s dive into this easy and fun recipe that will leave you craving more!
Why I Love This Recipe
- Decadent Flavor: The rich combination of dark chocolate and creamy sweetened condensed milk creates an irresistible fudgy texture that melts in your mouth.
- Simple Preparation: This recipe requires minimal ingredients and just a few straightforward steps, making it easy for anyone to whip up a batch.
- Cherry Additions: The maraschino cherries add a delightful burst of sweetness and a pop of color, making each bite a treat for the eyes and taste buds.
- Customizable Nuts: You can easily swap walnuts for pecans or omit them altogether, allowing for personal preferences and dietary needs.
Ingredients
Full List of Ingredients
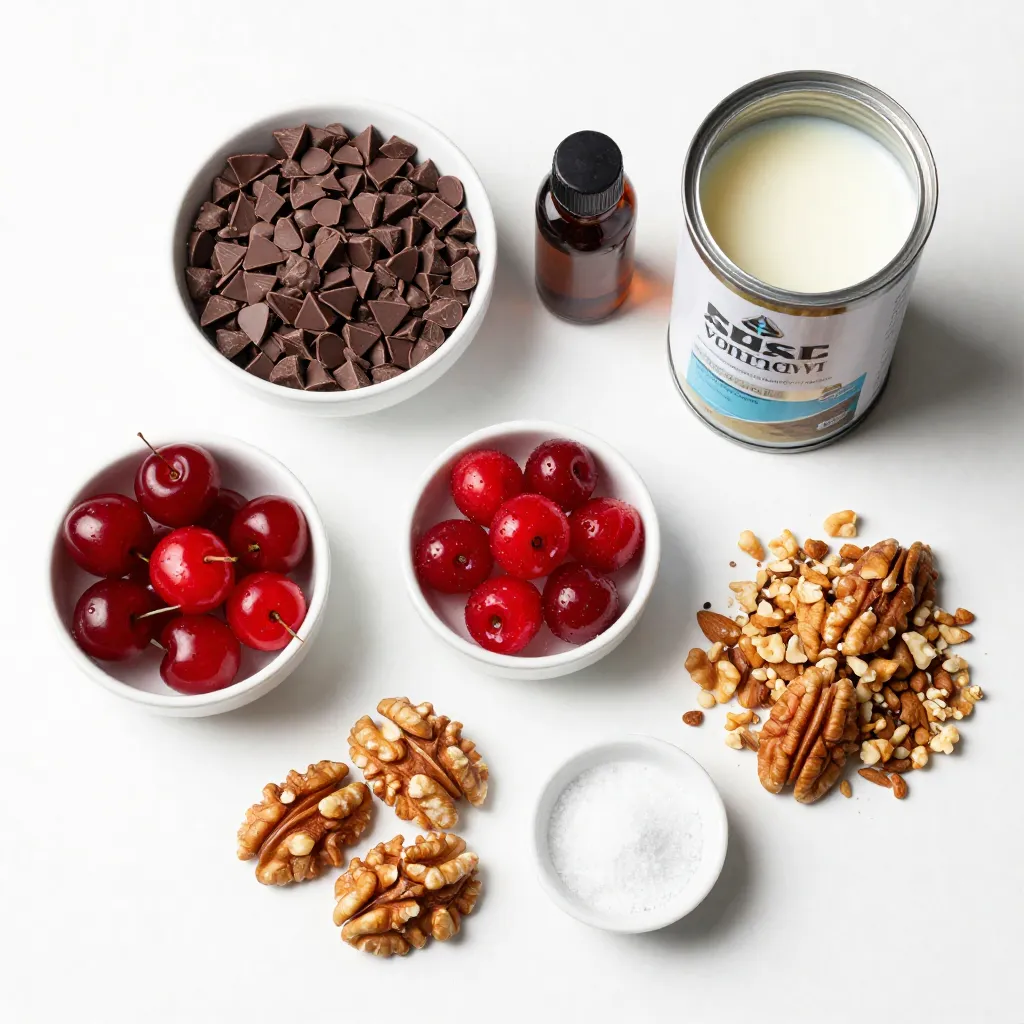
– 1 cup dark chocolate chips
– 1 cup sweetened condensed milk
– 1 teaspoon vanilla extract
– 1/2 teaspoon almond extract
– 1 cup maraschino cherries, drained and chopped
– 1/2 cup chopped walnuts or pecans
– Pinch of salt
The ingredients for Cherry Garcia Fudge Squares are simple but essential. Dark chocolate chips give the fudge its rich taste. Sweetened condensed milk provides sweetness and creaminess. Vanilla and almond extracts add a nice flavor boost. Chopped maraschino cherries give a fruity burst. Chopped walnuts or pecans add crunch. A pinch of salt rounds out all the flavors.
Ingredient Substitutions
You can easily swap dark chocolate chips for semi-sweet or milk chocolate chips. If you want a nut-free treat, you can skip the nuts or use seeds like sunflower seeds. For a homemade version, you can make sweetened condensed milk with milk and sugar. Just simmer them together until thickened. This way, you can control the sweetness and creaminess!
Step-by-Step Instructions
Preparation Steps
1. First, grab your 8×8 inch baking dish. Line it with parchment paper. Leave some paper hanging over the edges. This makes it easy to lift out the fudge later.
2. Next, take a medium saucepan. Combine 1 cup of dark chocolate chips and 1 cup of sweetened condensed milk in it. Heat this over low heat. Stir it constantly. You want the chocolate to melt completely. It should look smooth and creamy.
3. Once melted, remove the saucepan from the heat. Add 1 teaspoon of vanilla extract, 1/2 teaspoon of almond extract, and a pinch of salt. Mix it well until everything is combined.
Adding Cherries and Nuts
4. Now it’s time for the fun part! Fold in 1 cup of chopped maraschino cherries. Make sure they are evenly mixed in. This will give your fudge bursts of sweet cherry flavor.
5. Then, add in 1/2 cup of chopped walnuts or pecans. Fold these into the mixture gently. You want all the nuts and cherries to be well-distributed.
Setting and Cutting Fudge
6. Pour the fudge mixture into your prepared baking dish. Spread it evenly across the dish.
7. Place the dish in the refrigerator. Let it chill for about 2-3 hours. You want the fudge to be firm and set.
8. Once set, lift the fudge out using the parchment overhang. Use a sharp knife to cut it into squares. Aim for even sizes for a nice look.
Enjoy your Cherry Garcia Fudge Squares!
Tips & Tricks
Achieving the Perfect Texture
To get the best texture for your fudge, stir constantly while melting the chocolate. This helps the chocolate mix well with the sweetened condensed milk. If you stop stirring, you risk burning the chocolate. A smooth finish comes from patience and care.
After melting, let the mixture cool slightly. This step helps keep the fudge creamy. Pour it into the pan right away to maintain its softness.
Decoration Ideas
For a beautiful presentation, add whole cherries and nuts on top of the fudge. This adds a nice touch and makes it look fancy. You can also sprinkle a dusting of powdered sugar for an elegant finish. It brightens up the squares and makes them pop.
Common Mistakes to Avoid
One common mistake is overheating the chocolate. If it gets too hot, it might clump or burn. Keep the heat low and watch it closely.
Another issue is not mixing the cherries and nuts evenly. Make sure to fold them in gently but thoroughly. If they are not spread out well, some bites will lack the fruity and nutty flavors.
Pro Tips
- Use Quality Chocolate: The flavor of your fudge largely depends on the chocolate you use. Opt for high-quality dark chocolate chips for a rich taste.
- Chill for Best Results: Letting the fudge set in the refrigerator for a full 3 hours ensures it becomes firm and easier to cut into neat squares.
- Experiment with Nuts: While walnuts and pecans are classic choices, feel free to try other nuts like almonds or hazelnuts for different flavor profiles.
- Store Properly: Keep the fudge squares stored in an airtight container in the refrigerator to maintain freshness for up to two weeks.
Variations
Flavor Combinations
You can make Cherry Garcia Fudge Squares even more fun. Try adding different extracts. Mint or coconut extract can change the taste a lot. Just add one teaspoon to the mix.
You can also use other fruits. Raspberries or strawberries add a fresh twist. Chop them up and mix them in with the cherries. This gives a new flavor and a pop of color.
Dietary Adjustments
If you need a gluten-free treat, this recipe works well. The main ingredients are naturally gluten-free. Just make sure to check your chocolate chips.
For a vegan option, swap the sweetened condensed milk. You can use a coconut milk alternative. It will still taste rich and creamy. Use vegan chocolate chips for the best results.
Creative Twists
You can switch up the chocolate type too. Use milk chocolate instead of dark chocolate. This will make the fudge sweeter and creamier.
Another fun idea is to add a layer of white chocolate. Melt white chocolate and spread it on top of the fudge. It adds a nice look and a sweet contrast to the dark chocolate.
Storage Info
Proper Storage Techniques
To keep your Cherry Garcia Fudge Squares fresh, store them in an airtight container. This helps prevent them from drying out. You can also wrap them in plastic wrap before placing them in the container. This extra layer keeps the moisture in.
I recommend using a glass or plastic container. Glass containers work best because they do not absorb odors. Make sure the fudge is completely cool before sealing it.
Shelf Life
At room temperature, your fudge squares last about 3 to 5 days. Just place them in a cool, dry spot away from direct sunlight. If you want them to last longer, store them in the fridge. They can stay fresh there for up to 2 weeks.
For even longer storage, you can freeze the fudge squares. Wrap them tightly in plastic wrap and place them in a freezer-safe container. They can last up to 3 months in the freezer. Just remember to label the container with the date.
Reheating Instructions
If you want to soften the fudge before serving, use a microwave. Place a square on a microwave-safe plate. Heat it for 5 to 10 seconds. Check and repeat if needed. Be careful not to overheat, as it can become too soft and lose its shape. Enjoy your treat!
FAQs
Can I use milk chocolate instead of dark chocolate?
Yes, you can use milk chocolate. It will taste sweeter and creamier. Milk chocolate has less cocoa and more sugar than dark chocolate. This change affects the fudge’s rich flavor. If you love sweet treats, milk chocolate works great. If you want a more balanced taste, stick with dark chocolate. The choice is yours!
How do I make homemade sweetened condensed milk?
Making sweetened condensed milk is easy. Here’s how to do it step by step:
1. Gather Ingredients: You need 1 cup of milk and 1 cup of sugar.
2. Combine: In a saucepan, mix the milk and sugar.
3. Heat: Cook over low heat. Stir often until the sugar dissolves.
4. Simmer: Let it simmer for about 30-40 minutes. Stir regularly.
5. Thicken: The milk will thicken as it cooks.
6. Cool: Remove from heat and let it cool before using.
Now you have homemade sweetened condensed milk!
Can I freeze Cherry Garcia Fudge Squares?
Yes, you can freeze these fudge squares! Here are some tips for freezing and thawing:
– Wrap: Cut the fudge into squares. Wrap each square tightly in plastic wrap.
– Container: Place the wrapped squares in an airtight container. This helps keep them fresh.
– Label: Write the date on the container. This helps you know how long they’ve been in the freezer.
– Thawing: When you want to eat them, take out a square. Let it sit at room temperature for about 30 minutes. This helps the fudge soften for a perfect bite.
Enjoy your treats anytime you want!
In this article, we explored making Cherry Garcia fudge squares. We covered essential ingredients, including dark chocolate and cherries, along with substitutions for those who need them. I shared step-by-step instructions to help you create the perfect fudge, along with tips for texture and decoration.
Lastly, we discussed variations you can try and proper storage techniques. I hope you feel inspired to make this delicious treat and share it with loved ones. Enjoy creating your own Cherry Garcia fudg