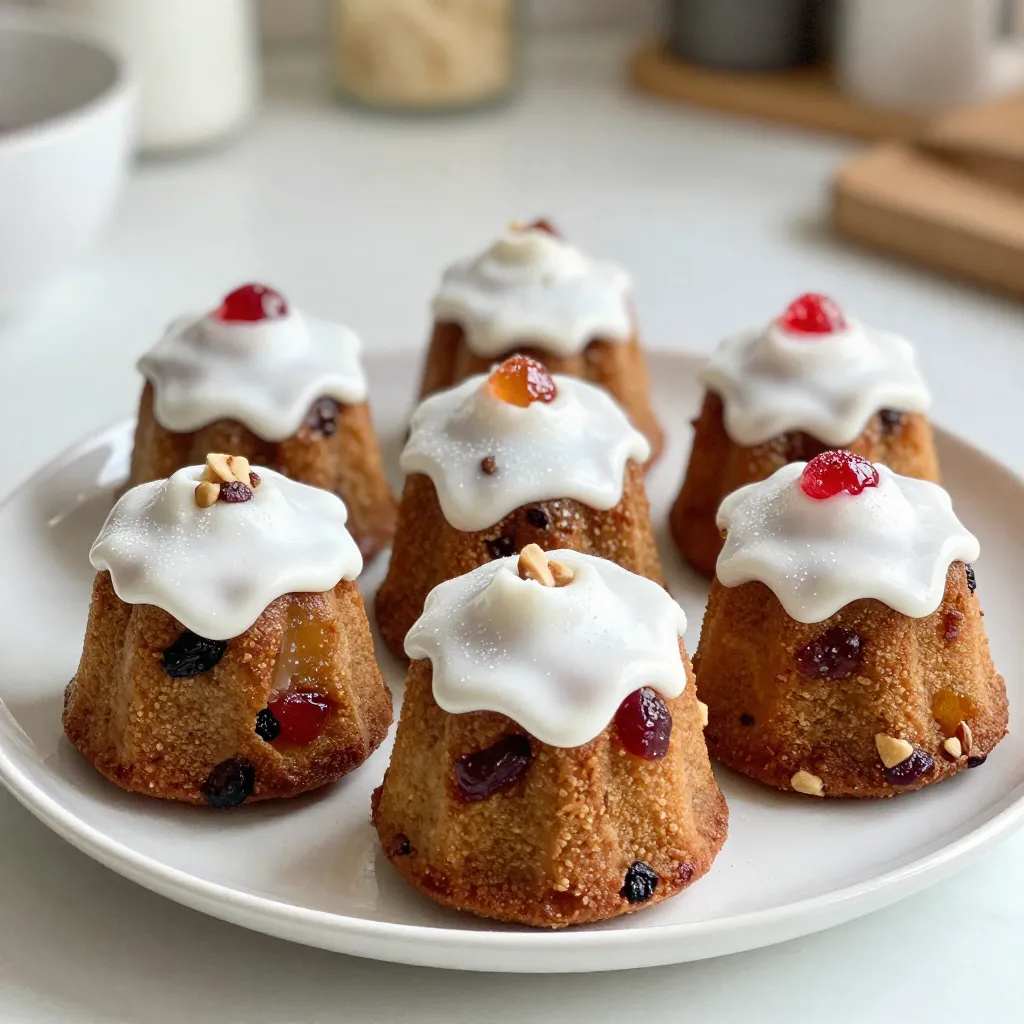
Get ready to spread festive joy with Mary Berry’s Mini Christmas Cakes! These bite-sized treats are perfect for your holiday gatherings. In this post, I will guide you through the ingredients, baking steps, and fun decorating tips. You’ll learn how to make these delicious cakes from scratch, ensuring they impress everyone at your Christmas table. Let’s dive in and make your celebrations even sweeter!
Why I Love This Recipe
- Festive Flavors: This recipe combines a delightful mix of dried fruits and spices that perfectly encapsulate the essence of the holiday season.
- Easy to Make: With straightforward instructions, even novice bakers can whip up these mini cakes with ease.
- Perfect for Gifting: These charming mini cakes make wonderful homemade gifts that are sure to impress family and friends.
- Customizable: You can easily adapt the recipe by adding your favorite nuts or dried fruits for a personal touch.
Ingredients
Detailed Ingredient List
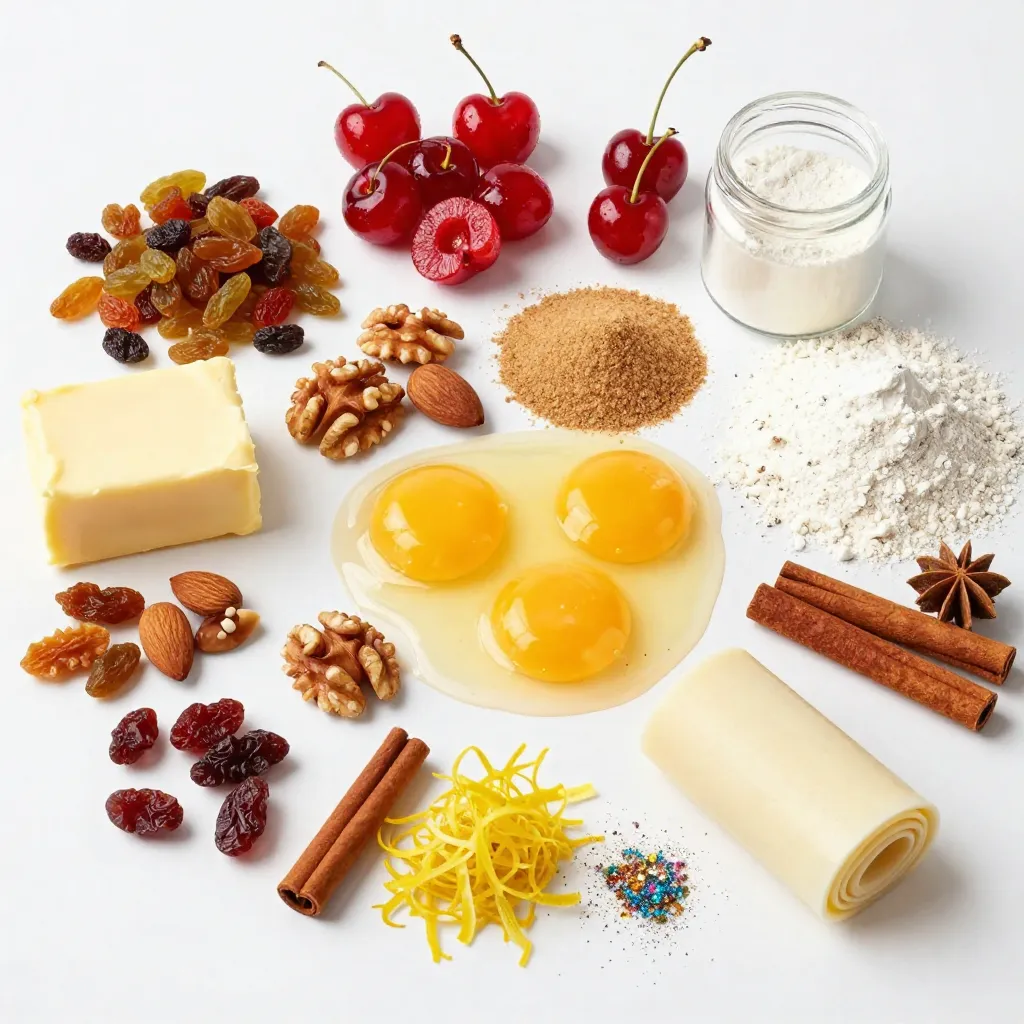
– 200g mixed dried fruit (raisins, currants, chopped dates)
– 100g glacé cherries, halved
– 100g mixed nuts, chopped (walnuts, almonds)
– 150g unsalted butter, softened
– 150g brown sugar
– 3 large eggs
– 175g plain flour
– 1 tsp baking powder
– 1 tsp ground cinnamon
– 1/2 tsp ground nutmeg
– Zest of 1 lemon
– 100g marzipan, rolled out (for topping)
– 100g ready-to-roll icing (for decoration)
– Edible glitter (optional, for garnish)
Tips for Selecting Quality Ingredients
Choosing the right ingredients makes a big difference. Here are some tips:
– Dried Fruit: Look for plump, moist dried fruit. Avoid any that feels hard or too dry.
– Nuts: Buy nuts that feel fresh and smell nutty. Check for any signs of rancidity.
– Butter: Use unsalted butter for better control of your cake’s sweetness.
– Sugar: Dark brown sugar adds a deeper flavor. Use it if you want a richer taste.
– Spices: Fresh spices have more flavor. If they smell weak, consider replacing them.
Common Substitutes for Allergies
If you have allergies, there are great substitutes:
– Nuts: Use seeds like pumpkin or sunflower seeds to avoid nut allergies.
– Eggs: Replace eggs with applesauce or flaxseed meal mixed with water.
– Flour: Use almond flour or gluten-free flour for a gluten-free option.
– Butter: Coconut oil can replace butter for a dairy-free choice.
– Marzipan: For nut allergies, use rolled fondant instead of marzipan.
These tips help you create delicious mini cakes while considering your needs and preferences. Enjoy your baking!
Step-by-Step Instructions
Prepping the Oven and Muffin Tin
First, preheat your oven to 150°C (300°F). This is important for even baking. While the oven heats, line a muffin tin with 12 cupcake liners. These will help the cakes pop out easily.
Creaming the Butter and Sugar
In a large mixing bowl, take your softened butter and brown sugar. Cream these two together until they look light and fluffy. This process adds air, which makes the cakes soft.
Mixing and Folding in Ingredients
Next, beat in the large eggs, one at a time. Make sure each egg blends fully before you add the next. Now, sift the plain flour, baking powder, cinnamon, and nutmeg together. Gently fold this mix into your batter. Be careful not to overmix. Then, add the mixed dried fruit, glacé cherries, chopped nuts, and lemon zest. Stir until everything is well combined.
Baking and Cooling the Cakes
Spoon the batter into the cupcake liners, filling each about three-quarters full. Place the muffin tin in the oven and bake for 25-30 minutes. You’ll know they are ready when a skewer comes out clean from the center. Allow the cakes to cool in the tin for 10 minutes. Then, transfer them to a wire rack to cool completely.
Topping with Marzipan and Icing
Once the cakes are cool, top each one with a layer of marzipan. Roll out your marzipan to fit the top of each cake. Then, cover with ready-to-roll icing. Smooth the top and sides for a nice finish. If you want some sparkle, add a dusting of edible glitter. This makes your mini cakes look festive and fun!
Tips & Tricks
Ensuring Perfectly Baked Mini Cakes
To bake mini cakes that shine, follow these simple tips:
– Use room-temperature ingredients. This helps the batter mix well.
– Preheat your oven. Always preheat to 150°C (300°F) for even baking.
– Fill liners correctly. Fill each about three-quarters full to allow rising.
– Check with a skewer. Insert a skewer in the center to test doneness. It should come out clean.
These steps make sure your cakes are moist and fluffy.
Troubleshooting Common Baking Problems
Sometimes, cakes don’t turn out as planned. Here’s how to fix common issues:
– Cakes are too dry. This happens from overbaking. Always set a timer.
– Cakes sink in the middle. This can be due to underbaking or adding too much fruit. Stick to the recipe’s amounts.
– Cakes are too dense. Make sure to sift your flour and baking powder before mixing.
These tips help you avoid common baking mistakes.
Decorating for the Festive Season
Decorating mini cakes makes them special. Here are fun ideas:
– Marzipan layer. Roll it out thin for a smooth finish.
– Icing with flair. Use ready-to-roll icing for easy decoration.
– Add sparkle. A light dusting of edible glitter makes them festive.
– Use festive shapes. Cut out shapes from icing for added charm.
These decorating tips bring a festive feel to your mini cakes.
Pro Tips
- Tip for Moist Cakes: To keep your mini cakes moist, consider soaking the dried fruit in a bit of fruit juice or rum overnight before adding them to the batter.
- Even Baking: Rotate the muffin tin halfway through baking to ensure even cooking, especially if your oven has hot spots.
- Marzipan Tips: If the marzipan is too sticky to work with, dust your hands and the surface with icing sugar to make it easier to roll out.
- Decorating Ideas: For a festive touch, use cookie cutters to create shapes from the icing, or add edible decorations like holly or stars on top.
Variations
Flavor Twists for Mini Christmas Cakes
You can add fun flavors to your mini Christmas cakes. Here are some ideas:
– Orange Zest: Swap lemon zest for orange. This adds a bright, citrus taste.
– Spices: Try adding ground ginger or cloves for warmth. Just a pinch goes a long way.
– Chocolate Chips: Mix in dark chocolate chips for sweet bites. They melt and blend well.
– Coconut: Add shredded coconut for a tropical twist. It gives a nice chewiness.
Alternative Icing and Topping Ideas
You can change up your icing and toppings too. Here are some fun options:
– Cream Cheese Frosting: Use cream cheese for a tangy topping. It pairs well with fruit.
– Fondant: Try colored fondant for a unique look. You can shape it into fun designs.
– Chocolate Ganache: Drizzle warm chocolate ganache on top for a rich flavor.
– Nuts and Fruit: Top with extra nuts or edible flowers for a festive touch.
How to Make Mini Cakes Gluten-Free
Making these cakes gluten-free is simple. Just follow these steps:
1. Flour Swap: Use a gluten-free flour blend in place of plain flour.
2. Check Labels: Ensure all dried fruits and nuts are gluten-free. Some may have traces.
3. Binding Agents: Add a tablespoon of xanthan gum to help with texture.
4. Bake Time: Keep an eye on baking time as it may change slightly.
These variations will make your mini Christmas cakes extra special and fun!
Storage Info
Best Storage Practices for Freshness
To keep your Mary Berry mini Christmas cakes fresh, store them in an airtight container. Line the container with parchment paper to absorb moisture. Keep the container in a cool, dark place, away from heat and light. This method helps maintain the cakes’ texture and flavor for longer.
Freezing Mini Christmas Cakes
You can freeze mini Christmas cakes for later enjoyment. Wrap each cake tightly in plastic wrap. Place them in a freezer-safe bag or container to prevent freezer burn. When you’re ready to eat, simply thaw them at room temperature. This way, you can enjoy festive treats long after the holidays.
How Long Do They Last?
When stored properly, mini Christmas cakes can last up to two weeks at room temperature. If frozen, they can last for about three months. Always check for signs of spoilage before eating. If you see any mold or notice an off smell, it’s best to discard them. Keeping these cakes well-stored ensures you have a delightful treat whenever you crave one.
FAQs
Can I make these cakes ahead of time?
Yes, you can make these cakes ahead of time. They keep well for weeks. Store them in an airtight container. This helps the flavors meld together. You can even freeze them for longer storage.
What is the best way to serve mini Christmas cakes?
Serve the mini cakes on a festive platter. You can garnish them with edible glitter for a sparkly touch. A cup of tea or mulled wine pairs nicely with these cakes. They are great for holiday gatherings or as gifts.
How to adjust the recipe for fewer servings?
To adjust for fewer servings, simply halve the ingredients. Use six cupcake liners instead of twelve. You can also bake them in a smaller pan. Keep an eye on the baking time, as smaller cakes may bake faster.
Can I customize the dried fruits and nuts used?
Absolutely! You can swap out dried fruits and nuts based on your taste. Try using cranberries or apricots for a twist. For nuts, pecans or hazelnuts work well. This makes the recipe very flexible and fun.
What are the nutritional values of mini Christmas cakes?
Each mini cake has a mix of sugars, fats, and fiber. The dried fruits add natural sweetness and vitamins. Nuts provide healthy fats and protein. For exact values, check the specific ingredients used.
This blog post covered everything you need for perfect mini Christmas cakes. We discussed choosing quality ingredients, prepping the oven, and step-by-step instructions to bake. Tips helped solve common issues, while variations added unique twists. Proper storage keeps your cakes fresh for longer.
In summary, baking these cakes is fun and rewarding. With the right ingredients and care, you’ll impress everyone during the festive season. Enjoy baking and sharing these tasty treats with those you lov