Get ready to impress your friends and family with my No-Bake Gnome Mini Cheesecakes! This fun and easy treat combines creamy cheesecake with creative gnome decorations. Perfect for parties or just a snack at home, these treats will surely delight everyone. With simple ingredients and step-by-step instructions, you’ll be a dessert hero in no time. Let’s dive in and make some sweet magic together!
Why I Love This Recipe
- Simple and Fun: This no-bake cheesecake recipe is easy to follow, making it perfect for both novice and experienced bakers. Plus, the colorful layers add a fun twist!
- Deliciously Creamy: With a rich cream cheese filling and whipped cream, these mini cheesecakes are irresistibly creamy and indulgent.
- Versatile Decorations: The option to add fresh fruits and cute gnome figurines allows you to customize each cheesecake for any occasion or theme.
- Perfect for Sharing: With 12 mini cheesecakes, this recipe is ideal for gatherings, parties, or simply sharing with family and friends.
Ingredients
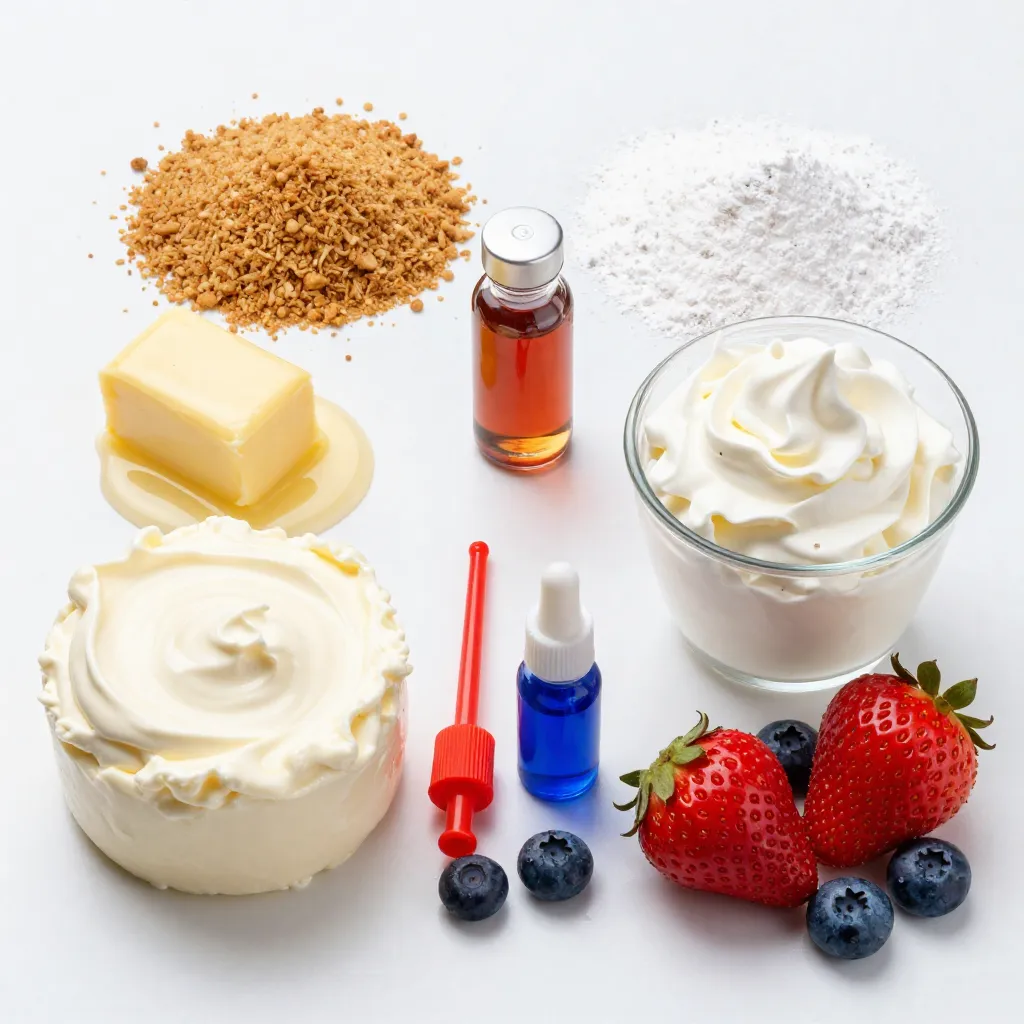
Key Ingredients for No-Bake Gnome Mini Cheesecakes
– 1 ½ cups graham cracker crumbs
– ½ cup unsalted butter, melted
– 2 cups cream cheese, softened
– 1 cup powdered sugar
– 1 teaspoon vanilla extract
– 1 cup heavy whipping cream
– Red and blue food coloring
– Fresh strawberries and blueberries for decoration
– Mini gnome figurines (optional for decoration)
These ingredients create a fun and tasty treat. First, graham cracker crumbs form the base. The melted butter helps bind them together. Next, cream cheese gives the cheesecake its creamy texture. Powdered sugar adds sweetness, while vanilla gives a lovely flavor. Heavy whipping cream makes the filling light and fluffy.
Food coloring is key for vibrant shades. Red and blue make these cheesecakes look amazing. Fresh strawberries and blueberries add color and taste. Mini gnome figurines are optional but bring charm to the dessert.
This combination makes each mini cheesecake a delight. You will enjoy the process and the tasty results!
Step-by-Step Instructions
Preparing the Crust
1. In a medium bowl, mix the graham cracker crumbs and melted butter.
2. Stir until all the crumbs are coated well.
3. Take mini tart pans or muffin tins, and press the mixture firmly into the bottom.
4. Make sure the crust is even.
5. Chill the crusts in the fridge while you prepare the filling.
Making the Cheesecake Filling
1. In a large mixing bowl, beat the softened cream cheese with an electric mixer.
2. Mix until it is smooth and creamy.
3. Gradually add the powdered sugar and vanilla extract.
4. Keep mixing until everything is well combined.
Whipping the Cream
1. In a separate bowl, whip the heavy cream until stiff peaks form.
2. This step is crucial for a light texture.
3. Gently fold the whipped cream into the cream cheese mixture.
4. Be careful not to deflate the whipped cream.
Coloring the Filling
1. Divide the cheesecake filling in half using a spatula.
2. Add red food coloring to one half and blue to the other.
3. Mix until you achieve your desired shades.
Assembling and Refrigerating
1. Spoon the red filling into half of the prepared crusts.
2. Add the blue filling into the other half.
3. Smooth the tops with a spatula for an even finish.
4. Refrigerate the mini cheesecakes for at least 4 hours.
5. Wait until they are set before serving.
Tips & Tricks
Decorating Your Mini Cheesecakes
To make your mini cheesecakes fun and festive, use fresh fruits like strawberries and blueberries. These bright colors pop and add a tasty touch. Just slice the strawberries and place them on top of each cheesecake. Scatter a few blueberries around for extra flair.
You can also add mini gnome figurines for a whimsical look. These little guys create a theme that kids will love. Just place one on each cheesecake before serving. It makes for a great photo op!
Ensuring Perfect Texture
To get a creamy cheesecake, use softened cream cheese. Beat it until smooth, with no lumps. This helps create a light and fluffy texture. When mixing, be gentle with the whipped cream. Fold it in slowly to keep that airy feel.
Chilling is key! After you assemble the cheesecakes, let them chill for at least four hours. This helps them set perfectly. A well-chilled cheesecake is creamy and holds its shape when served.
Presentation Tips
For a stunning display, arrange your mini cheesecakes on a colorful platter. This makes them stand out at any gathering. You can add edible flowers or fresh mint leaves around the cheesecakes. This not only adds color but also gives a fresh aroma.
Keep the serving simple yet elegant. A little care in presentation makes your no-bake gnome mini cheesecakes look gourmet. People will be impressed by your beautiful creation!
Pro Tips
- Chill the Filling: Make sure to chill the cheesecake filling for a few minutes before spooning it into the crusts. This will help it set better and make it easier to layer the colors.
- Color Mixing: When adding food coloring, start with a small amount and gradually increase until you achieve your desired shade. This helps avoid overly vibrant colors.
- Use a Spatula: For a smooth finish on the tops of your cheesecakes, use an offset spatula to gently spread and level the filling after spooning it in.
- Garnishing: For the best presentation, add garnishes just before serving to keep fruits fresh and vibrant. Consider using mint leaves for added color contrast.
Variations
Flavor Variations
You can make these mini cheesecakes even more fun! Try adding different flavor extracts. Almond or lemon extracts can give a nice twist. Just use about half a teaspoon. You can also experiment with fruit purees. Strawberry or raspberry purees mix well and add a fruity taste. Just fold in the puree gently after mixing the cream cheese.
Gluten-Free Option
If you want a gluten-free version, use gluten-free graham cracker alternatives. Many brands offer gluten-free options that taste great. Crush them in the same way as regular graham crackers. This way, everyone can enjoy these tasty treats without worry.
Decorating Themes
Get creative with decorations! For holiday-themed fun, use colored sprinkles or themed candies. You can also match the colors to the season. In summer, add fresh berries for a bright look. In fall, consider mini pumpkins or leaves made from fondant. The possibilities are endless, and your mini cheesecakes will be a hit!
Storage Info
Best Ways to Store
To keep your no-bake gnome mini cheesecakes fresh, refrigerate them. Place the mini cheesecakes in an airtight container. This prevents them from absorbing other smells. They will stay good for about four days in the fridge. If you need to store them longer, freeze them. Wrap each cheesecake in plastic wrap, then place them in a freezer-safe bag. This keeps them safe from freezer burn.
Shelf Life
In the fridge, these mini cheesecakes are best eaten within four days. After that, they may lose their taste and texture. You can tell if they are bad if you see mold or if they smell sour. If the texture is grainy instead of creamy, it’s time to throw them out. Always check before serving.
FAQs
Can I use any kind of cream cheese?
You can use different types of cream cheese. Regular cream cheese works best. It has the right texture and flavor for your no-bake cheesecakes. Low-fat cream cheese can work, but it may not be as creamy. Avoid using whipped cream cheese. It can make your filling too airy and less stable.
How long do these cheesecakes need to set?
These mini cheesecakes need to set for at least 4 hours. This time helps the filling firm up nicely. If you can, let them chill overnight. This gives the flavors more time to blend. A longer set time will yield a better texture.
Can I make these mini cheesecakes in advance?
Yes, you can make these mini cheesecakes ahead of time. They store well in the fridge for up to 3 days. Just cover them with plastic wrap to keep them fresh. You can also freeze them. Just remember to thaw them in the fridge before serving. This way, you’ll have a fun treat ready when you need it!
You learned about making no-bake gnome mini cheesecakes. We covered key ingredients, step-by-step instructions, tips for texture, and fun variations. You now know how to store these mini treats and can answer common questions, too.
These cheesecakes are a fun and tasty dessert, perfect for any gathering. Enjoy sharing your creations with friends and family. With this guide, you’ll impress everyone without the ove