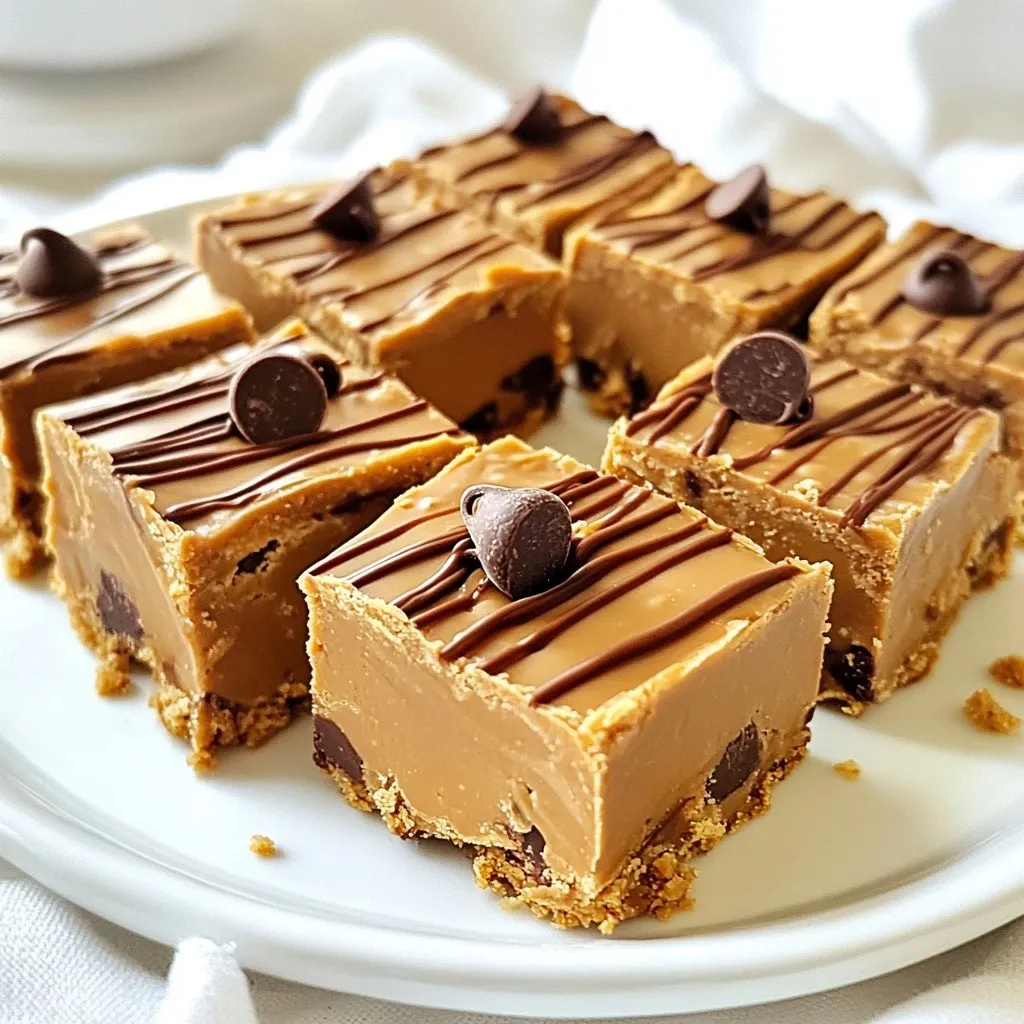
Craving a sweet treat that’s quick and easy? These No-Bake Peanut Butter Bars are just what you need! With simple ingredients and no oven required, you can whip these up in no time. I’ll guide you through each step, plus share tips and fun variations. Whether you’re in a rush or just want something tasty, these bars are perfect. Let’s get started on making your new favorite snack!
Why I Love This Recipe
- Quick and Easy: This recipe requires no baking, making it a perfect option for a quick treat that comes together in just 15 minutes.
- Healthy Ingredients: With wholesome ingredients like oats and peanut butter, these bars are a nutritious snack that satisfies your sweet tooth.
- Customizable: You can easily modify the recipe with different mix-ins like nuts, seeds, or dried fruit to suit your taste.
- Perfect for Meal Prep: These bars store well in the fridge, making them a great option for meal prepping snacks for the week.
Ingredients
List of Ingredients
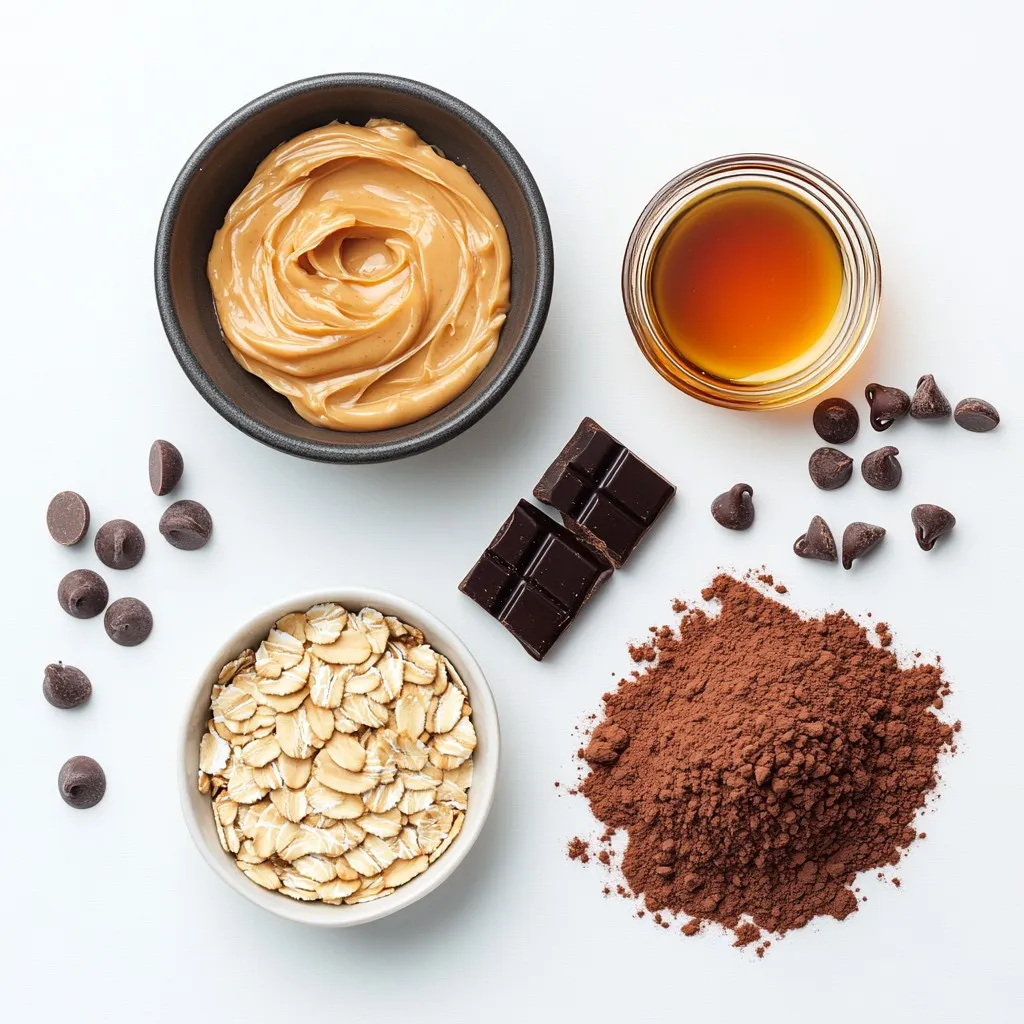
To make these no-bake peanut butter bars, you will need:
– 1 cup creamy peanut butter
– 1 cup rolled oats
– 1/2 cup honey or maple syrup
– 1/2 cup chocolate chips (dairy-free if desired)
– 1/4 cup unsweetened cocoa powder
– 1/4 teaspoon salt
– 1 teaspoon vanilla extract
These ingredients blend together to create a tasty treat. The peanut butter gives a rich flavor, while the oats add a nice chewy texture.
Equipment Needed
For this recipe, gather these items:
– A medium-sized mixing bowl
– A spatula or mixing spoon
– An 8×8 inch baking pan
– Parchment paper
– A microwave (if melting chocolate)
Having these tools ready makes the process smooth and easy.
Optional Add-ins
You can customize your bars with these fun add-ins:
– Chopped nuts for crunch
– Dried fruits for sweetness
– Extra chocolate chips for richness
– A sprinkle of sea salt on top
These add-ins can make your bars unique and even more delicious. Feel free to experiment with flavors you love!
Step-by-Step Instructions
Mixing the Base Mixture
Start by grabbing a medium mixing bowl. Add 1 cup of creamy peanut butter and 1/2 cup of honey or maple syrup. Mix these until they are smooth. This combination brings that sweet and nutty flavor. Next, add 1 cup of rolled oats, 1/2 cup of chocolate chips, 1/4 cup of unsweetened cocoa powder, 1/4 teaspoon of salt, and 1 teaspoon of vanilla extract. Stir everything together well. Make sure no dry bits remain. This step is key to a tasty bar.
Preparing the Baking Pan
Now, take an 8×8 inch baking pan. Line it with parchment paper. Leave some overhang on the sides. This makes it easy to lift the bars out later. The parchment also helps prevent sticking. Make sure the paper is smooth and covers the bottom and sides.
Pressing and Setting the Bars
Transfer the peanut butter mixture into the lined pan. Use a spatula or your hands to press it down evenly. Make sure to pack it tightly for the best shape. If you want, melt a few extra chocolate chips in the microwave. Drizzle them over the top for a nice touch. Let the mixture cool for a bit. Then, refrigerate the bars for at least 1 hour. This helps them firm up. After an hour, lift the bars out using the parchment overhang. Cut them into squares or rectangles. Enjoy your homemade treats!
Tips & Tricks
Achieving the Best Texture
To get the best texture, use creamy peanut butter. It blends well and gives a smooth finish. If you want a bit of crunch, try half creamy and half crunchy peanut butter. Press the mixture firmly into the pan. A tight pack helps the bars hold their shape. Allow the bars to chill for at least one hour. This cooling time firms them up nicely.
Storing Information
These bars are easy to store. Place them in an airtight container. Keep them in the fridge for up to one week. You can also wrap them in parchment paper for quick snacks. If you are making a big batch, cut them into squares first. This makes it simple to grab one whenever you want.
Substitutions for Dietary Restrictions
You can easily adapt this recipe for dietary needs. If you need it vegan, use maple syrup instead of honey. For a nut-free option, replace peanut butter with sun butter. You can also use gluten-free oats to make these bars gluten-free. Always check your chocolate chips. Look for dairy-free options if needed.
Pro Tips
- Use Natural Peanut Butter: For the best flavor and texture, opt for natural peanut butter without added sugars or oils. It will yield a creamier result.
- Experiment with Sweeteners: Feel free to substitute honey with agave nectar or maple syrup for a vegan option. Each sweetener adds a unique flavor profile.
- Add Protein Powder: For a protein boost, mix in a scoop of your favorite protein powder. This is especially great for post-workout snacks!
- Customize Your Toppings: Get creative with toppings! Sprinkle chopped nuts, shredded coconut, or dried fruits on top before refrigerating for added texture and flavor.
Variations
Chocolate Peanut Butter Bars
You can make these bars even more chocolatey. Just add more chocolate chips! Use 1 cup instead of 1/2 cup. Melt some extra chocolate and drizzle it on top. This simple step adds a layer of rich flavor. You’ll love the smooth blend of peanut butter and chocolate.
Nut-Free Options
If you need a nut-free treat, swap the peanut butter. Sunflower seed butter works well. It has a similar texture and taste. Check labels to ensure it’s safe for allergies. This way, everyone can enjoy the bars without worry.
Adding Dried Fruits or Nuts
Want more crunch or sweetness? Add dried fruits or nuts! Chopped dates, raisins, or cranberries boost flavor. You can also mix in chopped almonds or walnuts for crunch. Just remember to adjust the amount of oats if you add a lot. This will keep the bars from getting too soft.
Nutritional Information
Calories and Macronutrients
These no-bake peanut butter bars are a tasty treat. Each bar has about 150 calories. They pack 6 grams of protein, 7 grams of fat, and 19 grams of carbs. The healthy fats come from peanut butter, while oats add fiber. This mix gives you energy without too much sugar.
Health Benefits of Ingredients
– Peanut Butter: Rich in protein and healthy fats, it helps you feel full.
– Rolled Oats: These provide fiber, which is good for digestion.
– Honey or Maple Syrup: These natural sweeteners add flavor and some vitamins.
– Chocolate Chips: They can boost mood and taste great.
– Cocoa Powder: This adds antioxidants, which are good for your body.
Each ingredient works together to make these bars not just tasty but also good for you.
Portion Control Tips
It’s easy to eat too many bars because they taste great. Here are some tips:
– Cut the bars into smaller squares. This helps you enjoy them without overdoing it.
– Store them in a visible spot in the fridge. This way, you remember to have just one.
– Share with friends or family to enjoy together. It makes treats last longer!
Following these steps lets you enjoy the bars while keeping track of what you eat.
FAQs
Can I use crunchy peanut butter instead of creamy?
Yes, you can use crunchy peanut butter. It adds a nice texture to the bars. The bits of peanuts create a fun crunch that contrasts with the smoothness of the other ingredients. Just keep in mind that the bars may be a bit less smooth overall.
How long do no-bake peanut butter bars last?
No-bake peanut butter bars last about a week. Store them in an airtight container in the fridge. This helps keep them fresh and firm. If you notice any changes in smell or texture, it’s best to toss them out.
Can I freeze these bars for later?
Yes, you can freeze the bars for later. Wrap them tightly in plastic wrap or foil. Then, place them in a freezer-safe bag or container. They stay good for about three months. When ready to eat, just thaw them in the fridge overnight.
We explored key ingredients and equipment for making tasty no-bake peanut butter bars. I shared step-by-step instructions to help you create the perfect treat. You learned tips for ideal texture, storage, and substitutions for any diet. We also looked at fun variations and the bars’ nutritional benefits.
These easy bars are great snacks packed with flavor. Try them and enjo