Looking for a quick and tasty treat? You’ll love these No-Bake Peanut Butter Bars! They’re easy to make, require just a few ingredients, and taste amazing. In this post, I’ll share everything you need to create these delicious bars. From mixing the base to storing your treats, I’ve got you covered. Let’s dive into this fun and simple recipe that will satisfy your peanut butter cravings!
Why I Love This Recipe
- Quick and Easy: This recipe requires no baking and can be prepared in just 10 minutes, making it a perfect last-minute treat.
- Healthy Ingredients: Made with natural peanut butter and oats, these bars are a healthier alternative to traditional desserts.
- Customizable: Add your favorite mix-ins like nuts or dried fruits to personalize the bars to your taste.
- Deliciously Satisfying: The combination of peanut butter and chocolate creates a rich and satisfying flavor that everyone will love.
Ingredients
List of Ingredients
– 1 cup natural peanut butter (creamy or crunchy)
– 1/2 cup honey or maple syrup
– 1 3/4 cups rolled oats
– 1/2 cup powdered sugar
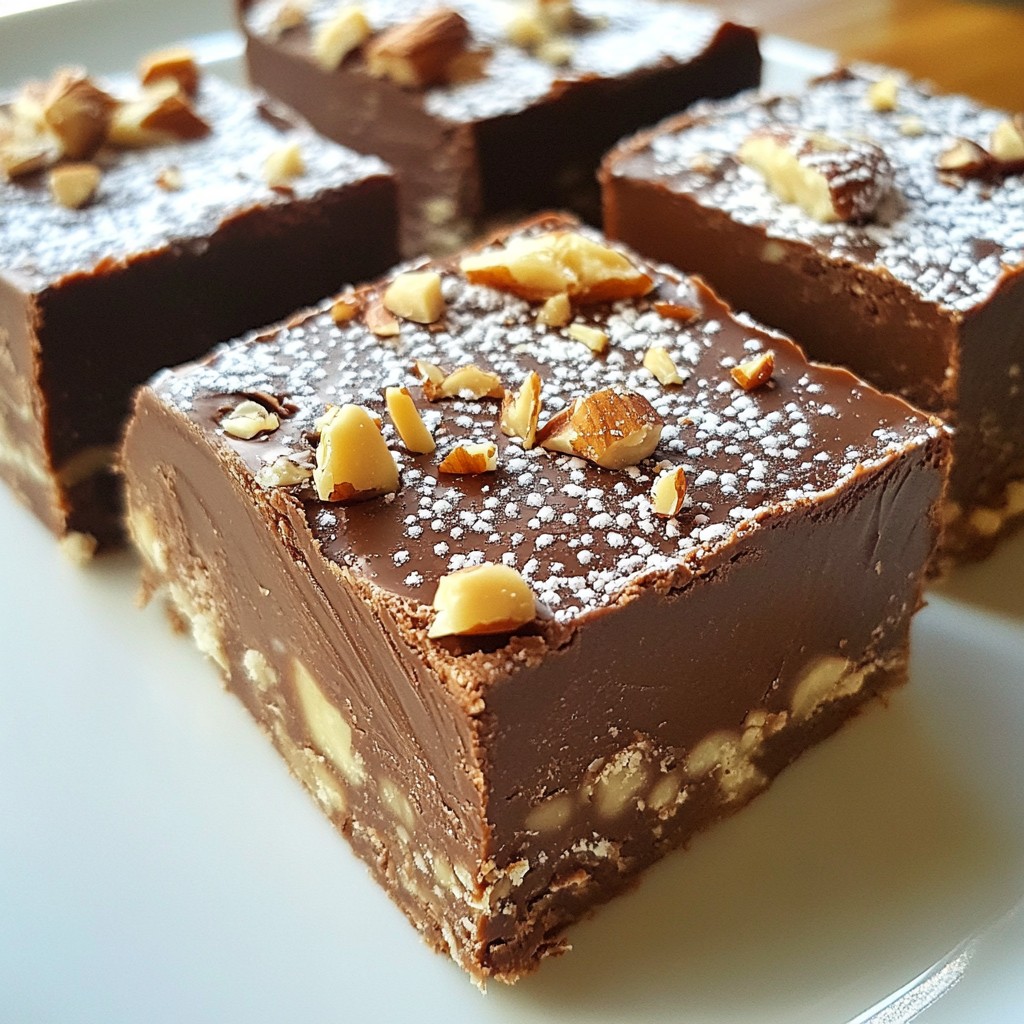
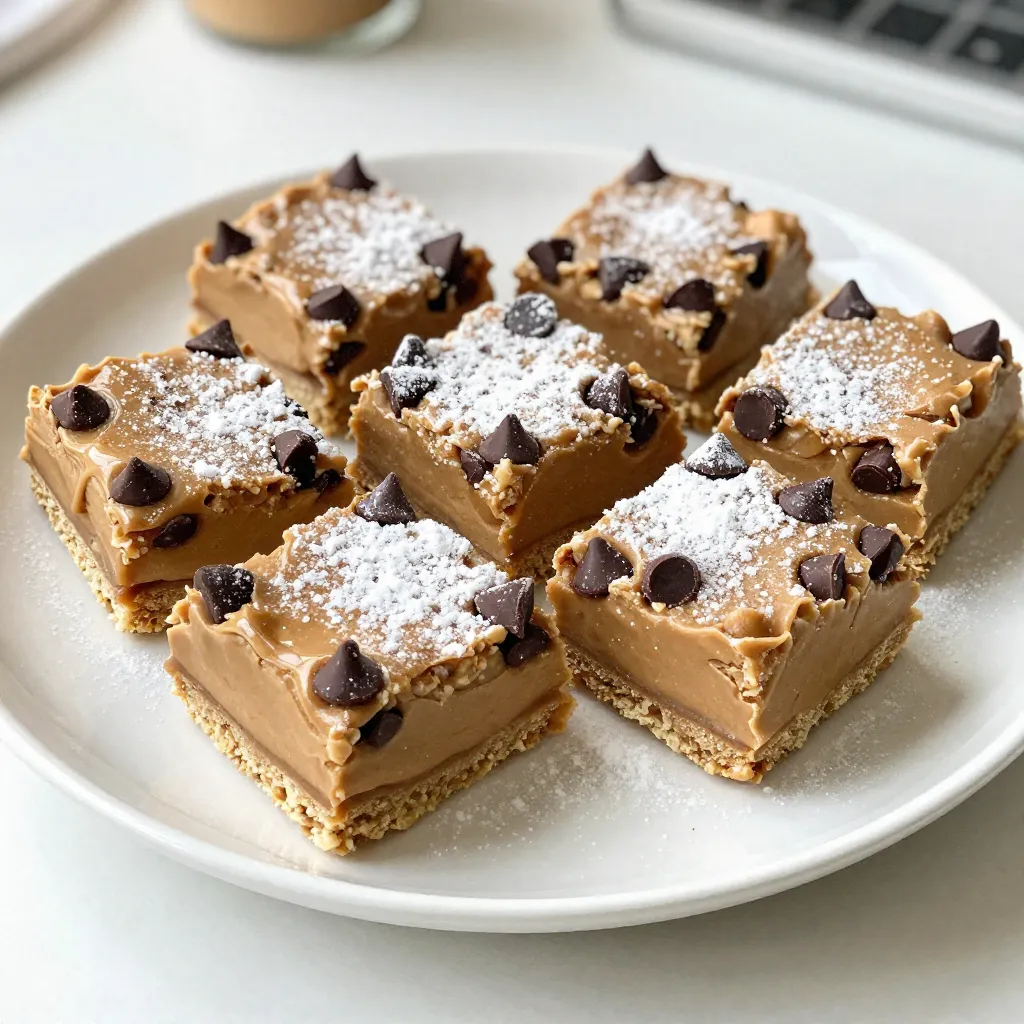
– 1/4 cup chocolate chips (dark or semi-sweet)
– 1/4 teaspoon salt
– Optional: 1/2 teaspoon vanilla extract
Measurements & Types
You can choose between creamy or crunchy peanut butter. Creamy gives a smooth taste. Crunchy adds fun texture. Honey is sweeter, while maple syrup brings a unique flavor. Use rolled oats for heartiness. Powdered sugar helps bind the bars well. Chocolate chips add a delightful touch of sweetness. Dark chocolate brings richness, while semi-sweet is classic. Use a pinch of salt to enhance flavors.
Optional Ingredients
Adding vanilla extract can deepen the flavor. It pairs well with peanut butter. If you want a nut-free snack, try sunflower seed butter. You can also mix in nuts or seeds for a crunchier texture. Experiment with dried fruit or coconut for added flavor.

Step-by-Step Instructions
Mixing the Base
Start by grabbing a medium mixing bowl. Add 1 cup of natural peanut butter. You can use creamy or crunchy, based on your taste. Next, pour in 1/2 cup of honey or maple syrup. Stir these two together until smooth. Make sure the mix is well blended. Now, add 1 3/4 cups of rolled oats, 1/2 cup of powdered sugar, and 1/4 teaspoon of salt. If you love flavor, toss in 1/2 teaspoon of vanilla extract. Mix everything thoroughly until you see no dry spots. This base will be thick and sticky.
Forming the Bars
Now it’s time to shape your bars. First, line an 8×8 inch square baking dish with parchment paper. Let the paper hang over the sides. This helps with easy removal later. Transfer the peanut butter mixture into the dish. Use a rubber spatula or your hands to press it down firmly. Make sure it forms an even layer. You want it to be compact, so the bars hold together well.
Chilling and Cutting the Bars
Once you have formed the bars, it’s time to chill. Place the dish in the refrigerator for at least 2 hours. This helps the bars set and become firm. After chilling, lift the bars out using the parchment paper. Now, you can cut them into squares or rectangles. Enjoy your tasty no-bake peanut butter bars as a snack or dessert!
Tips & Tricks
Tips for Smooth Mixing
To get a smooth mix, start with room temperature peanut butter. It blends easier with honey or maple syrup. If you want an even creamier texture, use creamy peanut butter instead of crunchy. Mix the peanut butter and sweetener first. Stir until it looks glossy. This step makes it much easier to add the other ingredients.
How to Ensure Perfect Texture
To get the right texture, press the mixture down firmly in the pan. Use a rubber spatula or your hands. This helps the bars hold together. If the mixture feels too dry, add a little more honey or maple syrup. If it’s too wet, add a few more oats. The goal is a firm, yet slightly soft bar.
Customizing Flavor Profiles
You can change the flavor of your bars easily. Try adding 1/2 teaspoon of vanilla extract for a sweeter taste. Want a chocolate kick? Add more chocolate chips or sprinkle cocoa powder in the mix. For a nutty crunch, toss in some chopped nuts or seeds. This way, you can make the bars just how you like them!
Pro Tips
- Use Natural Peanut Butter: Opt for natural peanut butter without added sugars or oils for a healthier treat.
- Chill for Optimal Texture: Allow the bars to chill for at least 2 hours to achieve the perfect firmness for slicing.
- Customize Your Sweetness: Adjust the amount of honey or maple syrup based on your personal taste preferences.
- Add Extra Crunch: Incorporate chopped nuts or seeds into the mixture for added texture and nutrition.
Variations
Vegan Version Alternative
You can make these no-bake peanut butter bars vegan. Simply swap honey for maple syrup. This keeps the bars sweet and sticky. Use a natural peanut butter without added oils. Make sure to check labels to avoid any dairy. These bars stay delicious and creamy, perfect for everyone.
Nut-Free Adaptation
If you need a nut-free version, use sunbutter instead of peanut butter. Sunbutter comes from sunflower seeds and tastes great. It mimics the texture of peanut butter well. Ensure that your oats are certified gluten-free if needed. The bars will still have that lovely chewy texture we all love.
Adding Flavors and Mix-Ins
You can add more flavor to your bars. Consider mixing in a bit of cocoa powder for chocolate lovers. For a fruity twist, add dried fruits like raisins or cranberries. You can also use seeds for extra crunch. Chia seeds or pumpkin seeds can add nutrition and texture. These small changes can make your bars unique and fun!
Storage Info
Best Storage Practices
To keep your no-bake peanut butter bars fresh, store them in an airtight container. This helps keep their texture and flavor. You can place parchment paper between layers to prevent sticking. If you want to keep them longer, consider refrigerating them.
Shelf Life of Bars
These bars last about one week in the fridge. If you keep them in an airtight container, they stay tasty. After a week, they may lose some flavor and texture but can still be safe to eat. Check for any changes in smell or appearance.
Freezing Options
You can freeze these bars for even longer storage. Cut them into squares before freezing so you can grab one easily. Wrap each bar tightly in plastic wrap and then place them in a freezer bag. They can last up to three months in the freezer. To enjoy, just thaw them in the fridge overnight.
FAQs
Can I use alternative sweeteners?
Yes, you can use other sweeteners. Maple syrup or agave syrup works great. You can also try stevia or monk fruit. Both options lower the sugar content. Just remember, they may change the flavor a bit.
What type of peanut butter is best?
I suggest using natural peanut butter. It has simple ingredients and no added sugar. Creamy peanut butter gives a smooth texture. Crunchy peanut butter adds fun bits for extra crunch. Choose what you like best!
How do I know when the bars are set?
The bars need to chill for at least 2 hours. They should feel firm to the touch. If they hold their shape when you lift them, they’re ready. If they’re too soft, let them chill longer.
This article covers the main ingredients and step-by-step instructions for making delicious bars. I shared tips for smooth mixing and texture. You can customize flavors or switch to vegan or nut-free versions. Always store your bars properly to keep them fresh.
In summary, making these bars is simple and fun. Get creative with flavors to make them yours. Enjoy the process and share your tasty treats with friend